Setting up blueprints in Blender
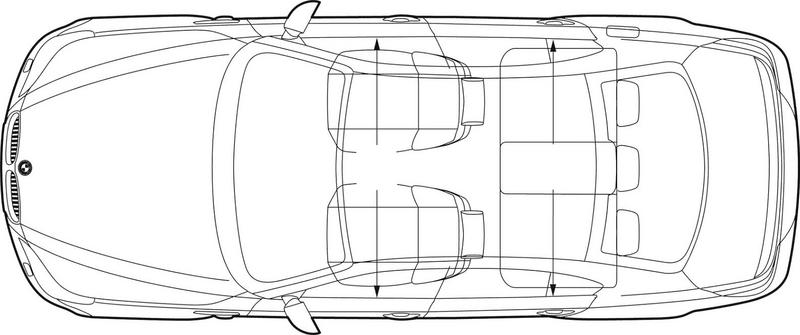
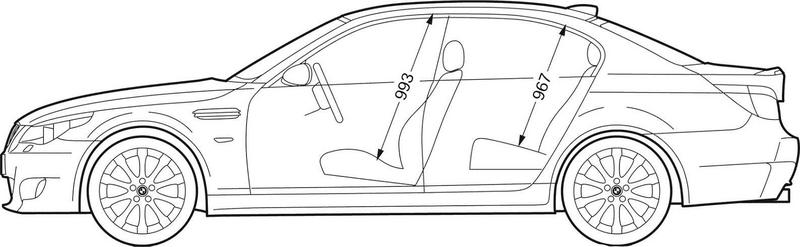
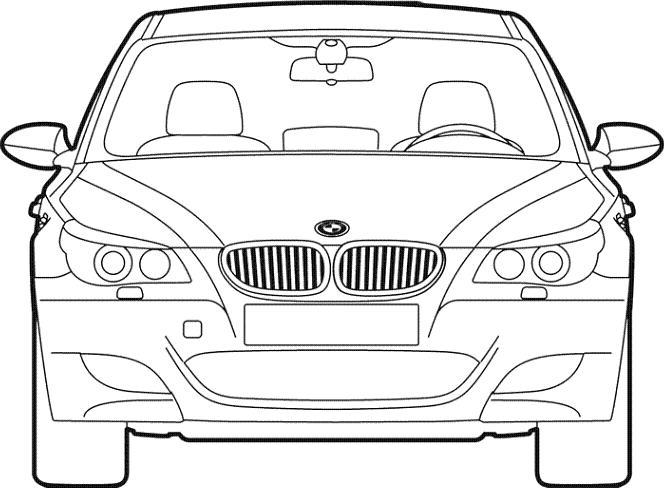
Okay, to start out your going to need to get an image of the blueprints you want, I've chosen to use the BMW M5 (E60).
After you have chosen the image you like you're going to need to take it into a photo editing program and cut out each picture and save it in its own view. For this one I just used MS Paint because it is a free program just like blender, you could also use The Gimp, which is also free, but MS Paint is all you need for doing this.

Now that you have that set up go ahead and launch Blender. If you still have the setup in its default format it should only be showing one box for the 3D model.
Next we have to split the view area into 4 different sections. To do this hover your mouse in between the 3D modeling area and the top header and right click.
Left click on �Split Area� and move the mouse down. A vertical line will be following your mouse. This is where the split will occur. Try to set it directly across the center of the viewing area, use the Axis's to help you.
Now you need to split each of the two sides in half again, this time right click on the center line to split them. Also remember to try to put the in the center across the Axis lines.
Now your view should be split into 4 different areas. After that we need to change the camera views of each section. The sections that we want are a Top, Side, Front, and Perspective view. You can change the view in each of them by opening up view and changing them or by using your Num Pad. To choose which ones will be what view should be set up the way drafting is used.
Alright with that set up its just one more easy step and that's putting your blueprints on the correct views. We will start out with the side view, in its header click on view and go down and click on background image.
It should open up a new mini window called Background Image. Click �Use Background Image� and then click on the folder icon to go into the file menu.
Now go and find your image of your top view and click on it and then click on �Select Image
Now your Image should be set in place, the only problem is that blender guesses the size that you want the picture to be so it may have to be adjusted later. You can change the Translucency (Blend), size, and offset if you please, but just remember that the other pictures have to correspond with this one so if you move things might not line up very well.
NOTE: I change the blend to 0 so that I can see the images easier, but that a personal preference.
After you have decided that that is the way you want the picture, close the background image window and repeat those steps on the side and front views.

Okay, with them all in now we have to worry about the sizes. As you can easily tell that with the base box in there the front view is way too big. So what I am going to do to determine there size is scale (S) the size of that base box to match the side and top view since you can tell by the gray guide lines that they are set at the right scale.
*NOTE: To get the box transparent hit the �z� key in the view that you want it transparent.
Well that wasn't too hard now we need to change the size of the front view to match the box that is already created. So go back into view and change the size until it fits into the box.
Alright now that that is complete I recommend saving you file off. You no longer need the original base box so you can delete it if you wish or start modeling with it.
NOTE: I know that I did not set up the back view. This is because blender will use the same picture for the front and back view. If you want to get into the back view, hold ctrl while selecting the front view. Ctrl flips the camera to the other side ex: Front to Back and Top to Bottom. But you'll still have to change the image each time you switch it.
I suggest using the Perspective camera and put it onto the Back View and set your image there, then each time you set it back to the back view it will show the picture, but when it is in any other angle it will show nothing.
Well that's the tutorial how you model it is up to you. I hope this answered some of the questions you may have had, if you have anymore contact me at poke_a_fish@yahoo.com and I'll try to answer them.
Good luck and have fun,
Scott Sherrick aka. poke_a_fish


